Got your controller? You'll be running your first lighting mode in under 10 minutes. No programming, no computer needed — just a phone.
"WS2815" and "12V" describe the strip type, but the whole installation also has to be sized for the strip's current draw. Confirm your strip with the LED Compatibility Checker, pick one from the WS2815 Buying Guide, and plan the power path with the Wiring Designer.
Last reviewed: July 2026
Your controller ships in a compact 3D-printed case. Check that you have everything before you start.
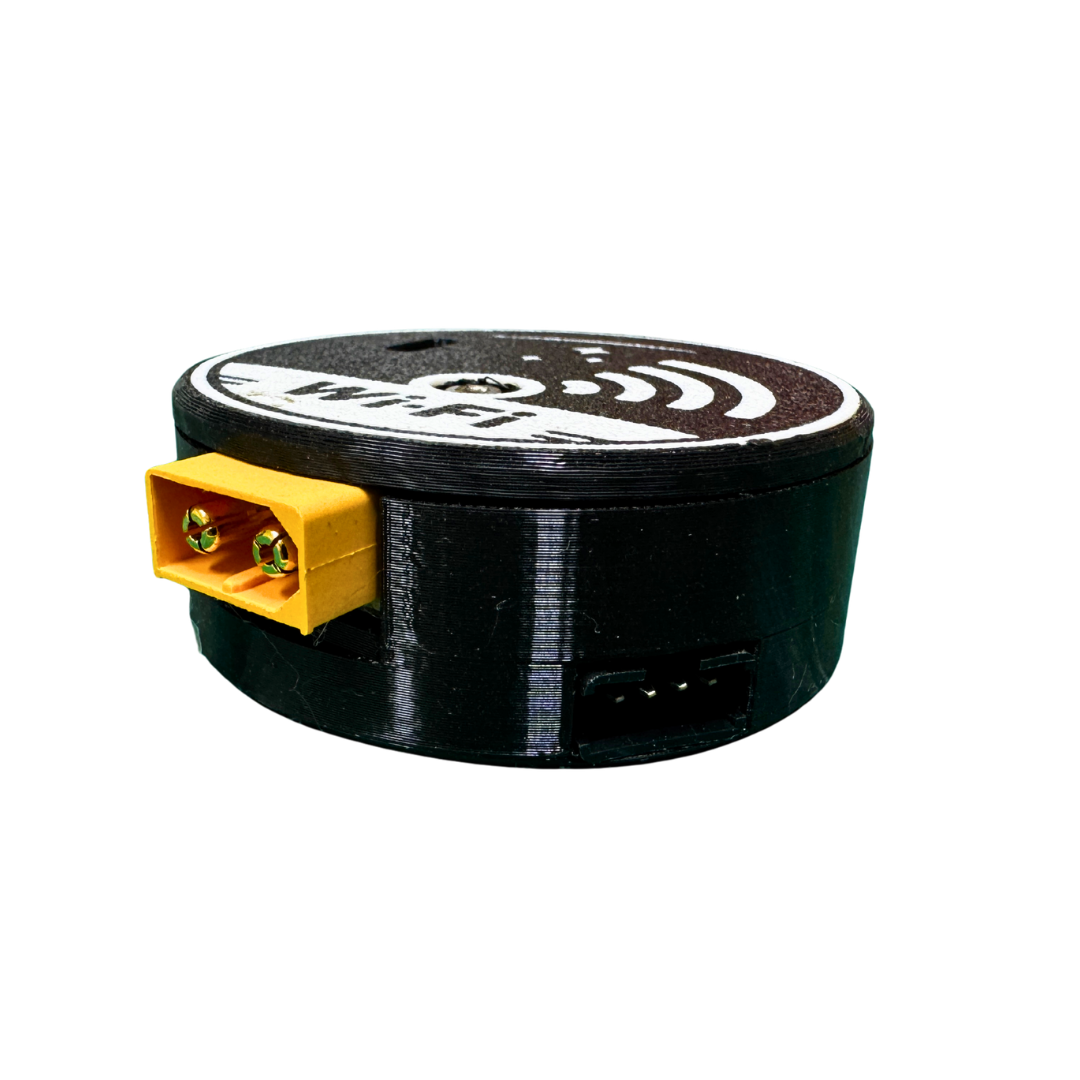
The controller provides two LED output connections. How those outputs behave depends on the selected project template and the firmware version installed. Each WS2815 strip has three wires: +12V, GND, and DATA.
The controller runs on 12V DC, so you can power it directly from a 3S LiPo (about 9.0V empty to 12.6V fully charged) — or from a 12V BEC off your flight battery or a bench 12V supply. Do not use a 4S or larger pack, or a 5V receiver or ESC output.
Yes. The controller runs on 12V, and a 3S LiPo sits right in that range — about 12.6 volts fully charged down to roughly 9.0 volts when low — so you can wire a 3S pack straight to the RED (+) and BLACK (–) power leads. Keep the controller and strips on a common ground, and match your pack's current capacity to the length of strip you're running. Do not use a 4S or larger pack — the higher voltage can damage the controller — and never power it from a 5V receiver or ESC output.
There's no single universal number — it depends on the current your board, connectors, wire gauge, power source, and any fuse can safely carry, plus LED density, brightness, and cooling. The strips draw their power separately from the data signal, so long or high-density runs often need power injection, thicker wire, or separate fused power distribution rather than pulling everything through the controller. The WS2815 buying guide covers strip current and safe powering; if you're unsure, start short and measure before you scale up.
Once powered, the controller starts its own Wi-Fi hotspot. Your phone connects to it like any other Wi-Fi network — no app download needed.
Connect your battery. The controller boots in about 5 seconds. You'll see the LED strips briefly flash white during startup.
Look for a network named RC-Lights — it's an open network, so there's no password.
No password required. Your phone may warn that this network has no internet — that's normal. Stay connected.
Navigate to 192.168.4.1 (also on your quick-start card). The controller UI loads instantly — no internet connection needed.
The browser UI shows all the built-in effects. Tap one to activate it immediately. Changes take effect on the strips within a fraction of a second.
1. Make sure the controller is powered (check that the battery is fully charged and the connection is solid). 2. Wait 10 seconds after powering on — the controller takes a moment to boot. 3. Pull down to refresh the Wi-Fi network list on your phone. 4. If still nothing: disconnect the battery, wait 5 seconds, reconnect.
Make sure you're typing the address exactly: 192.168.4.1 — no "https://", no "www." Some phones try to add these automatically. If your phone shows "No internet connection" and redirects you — tap "Stay Connected" or "Use without internet" when prompted, then navigate to 192.168.4.1 manually in your browser address bar.
First, check that the mode isn't set to "Off" in the browser UI. Then check the DATA wire: the yellow wire from the controller output must connect to the DATA pad on the LED strip (not the power or ground pads). WS2815 strips only respond to data on the correct input pin — verify you haven't swapped DATA and +12V on the strip connector.
This is almost always a ground issue. Make sure the GND from the controller and the GND from your LED strips both share a common ground with your battery or BEC. If the grounds aren't shared, the data signal has no reference and the LEDs will flicker or show random colors. Run a ground wire from the controller GND to the same point where your LED strip GND connects to the battery.
Disconnect power immediately. A controller, connector, or wire that becomes too hot to comfortably touch can indicate reversed polarity, a short circuit, damaged wiring, excessive LED current, undersized wire or connectors, poor ventilation, or input voltage outside the recommended 12V range. Check that:
Don't keep operating a hot system until you've found the cause.
Confirm your strip, double-check the wiring, or send me the details — battery voltage, strip specs, and what's happening. I reply personally when I can.